Showing posts with label LED. Show all posts

2018/02/27

Arduino - Switch celling light with TV remote (2/2)

This is the part two of Switch celling light with TV remote tutorial. If needed, please check out the part one from link below. By the way, the source code is also available there.


Quick Link


System Design

See the illustration below. I used a phone charger(purple block; AC110V to DC5V) to supply power from 110v AC power outlet from the celling. The Arduino controls the relay module to switch the celling light and Arduino interpret IR code to change  RGB LED to shift color and on/off accordingly. 

Connections

  • IR Receiver to Arduino pin 2
  • IR Receiver + to VCC
  • IR Receiver - to GND
  • Relay + to VCC
  • Relay - to GND
  • Relay to Arduino pin 8
  • RGB Red to Resistor to Arduino pin 3
  • RGB Green to Resistor to Arduino pin 5
  • RGB Blue to Resistor to Arduino pin 6
  • *** CAUTION: Turn off home main power switch first before 110V connection! ***
  • *** Connect 110V to the system after you secure prefboard to the celling light ***
  • Connect 110V VCC to "Relay NO (Normally Open)" on the left
  • Connect Relay COM (Common connection) to 110V GND. 

      Step by step


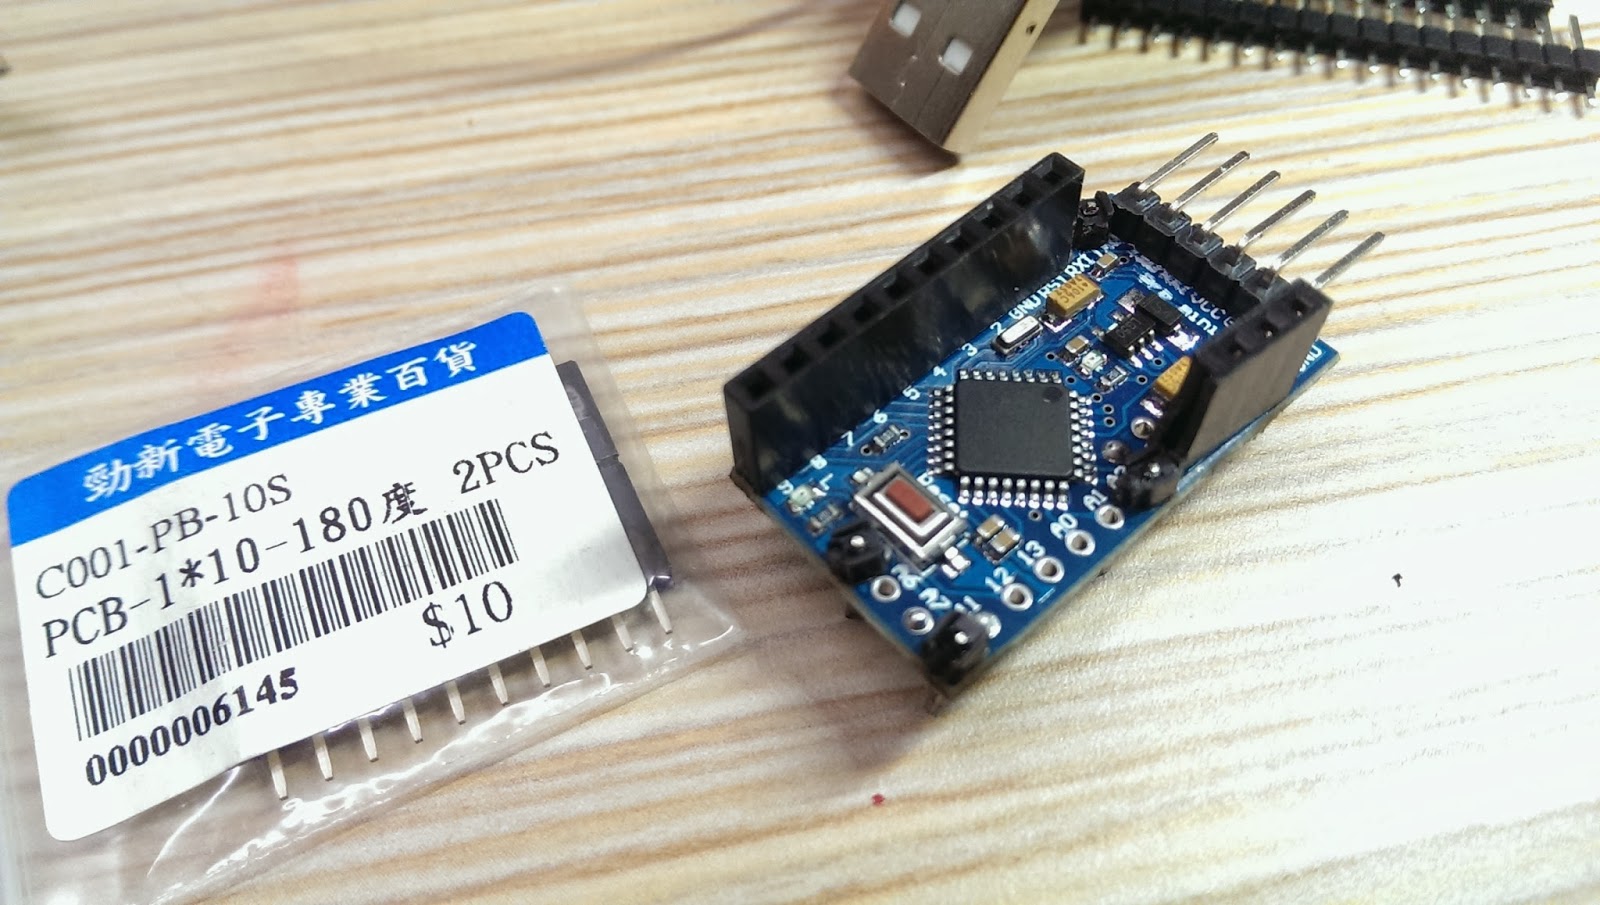
      Solder pins to Arduino mini pro.

      Pick up the corner of the perfboard as the fix position. Then, solder pin header connectors on the side of Arduino mini pro, so we could have the flexibility to change wiring later.  Don't forget to face Arduino five data pins towards outside of the prefboard for easier connection to upload source code later.

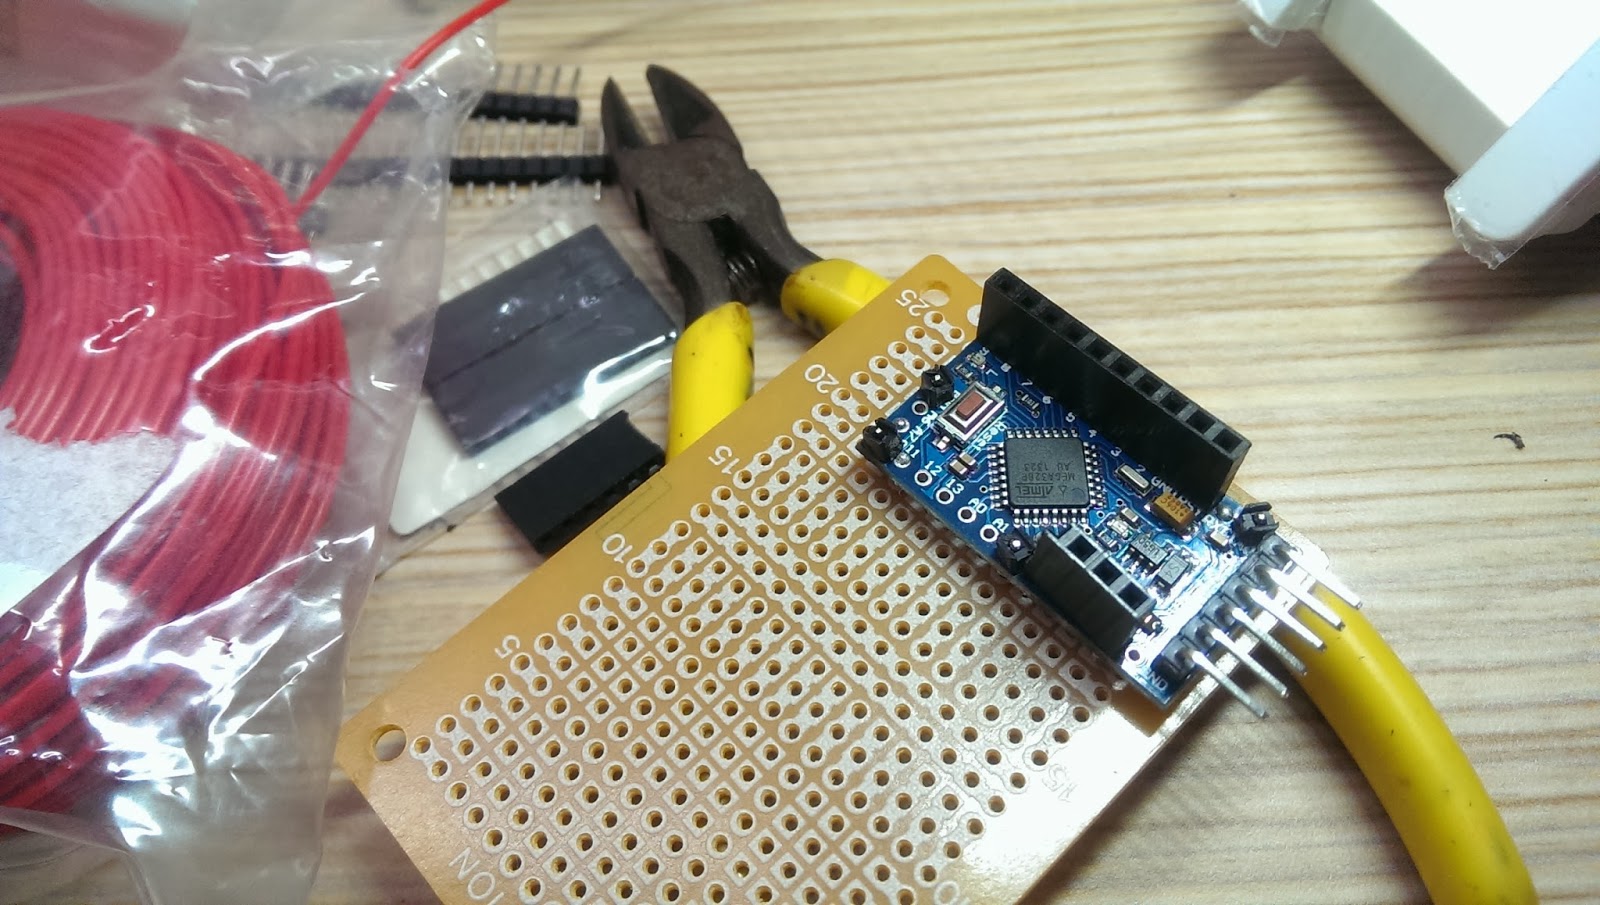
      Selected few unused solder holes from the Arduino Mini Pro and used the connection pin headers as supporting material on the perfboard. This could prevent unintentional shortage. See below:


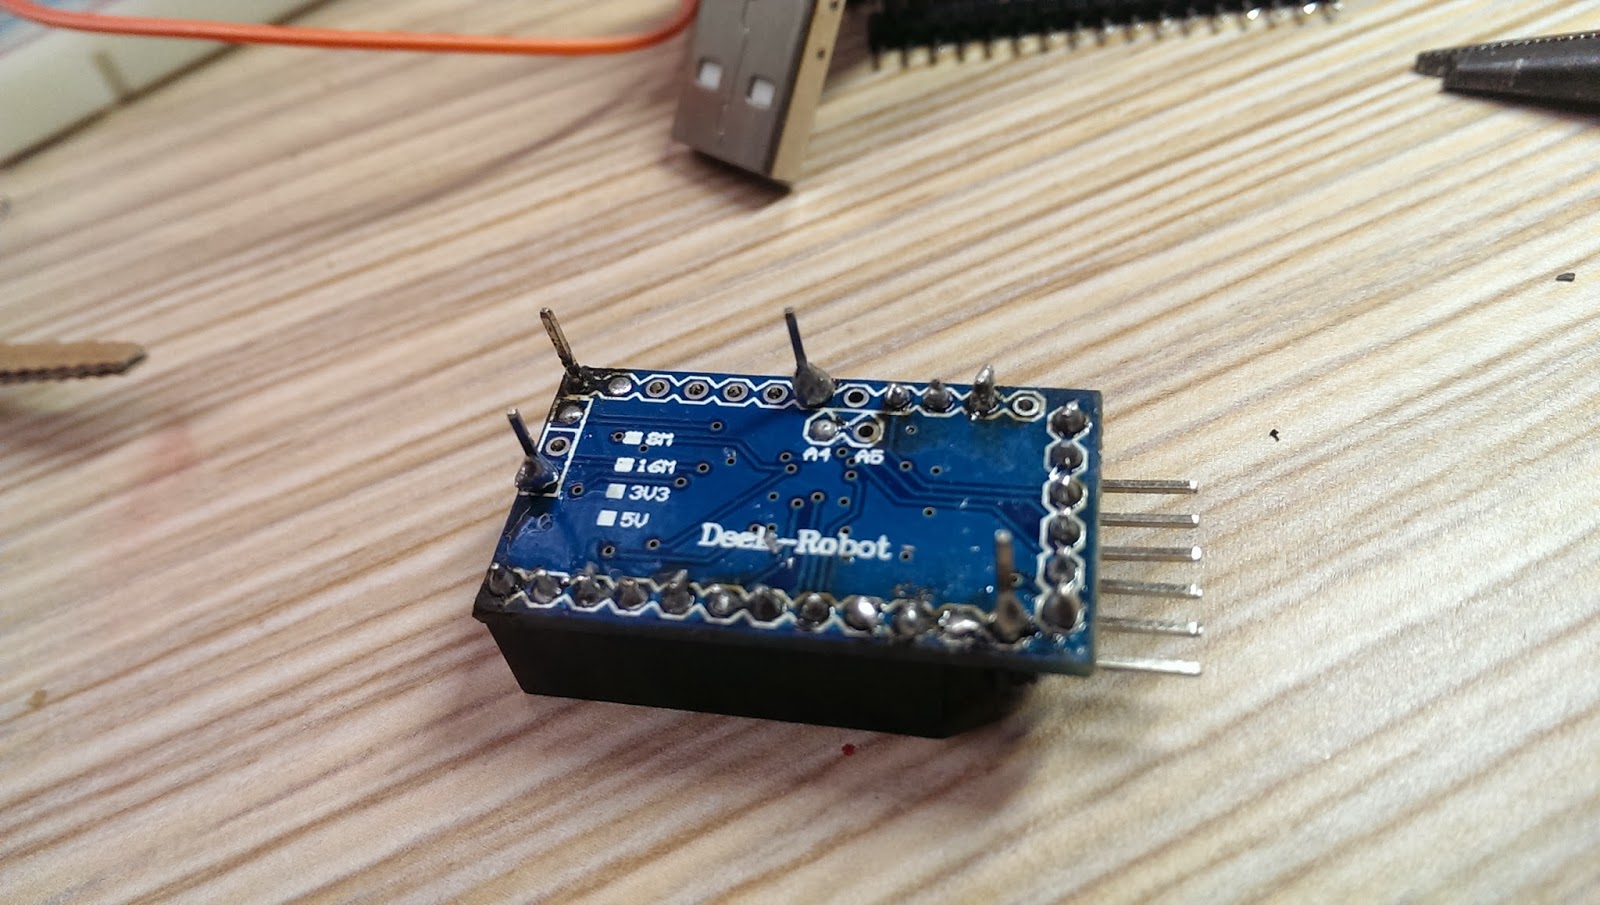
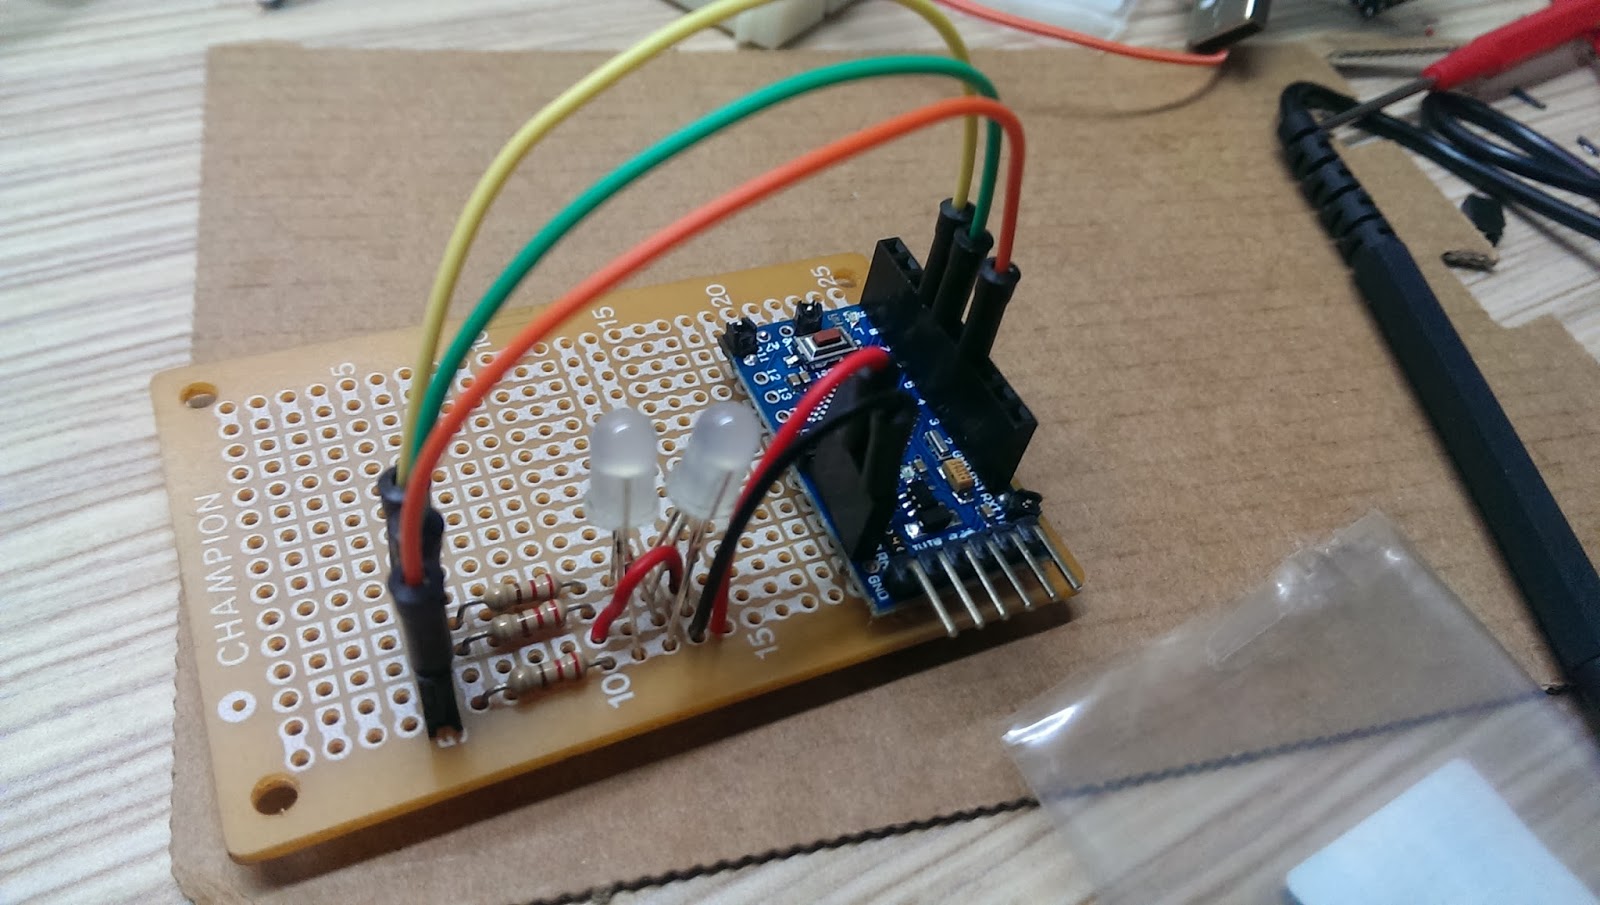
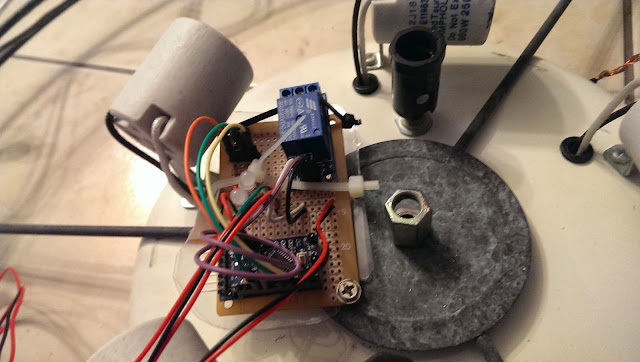
      After fixed Arduino Mini Pro in place, solder RGB LED, resistors, and wires to the prefboard. 
      Remember to power up to test the whole setup before moving forward.


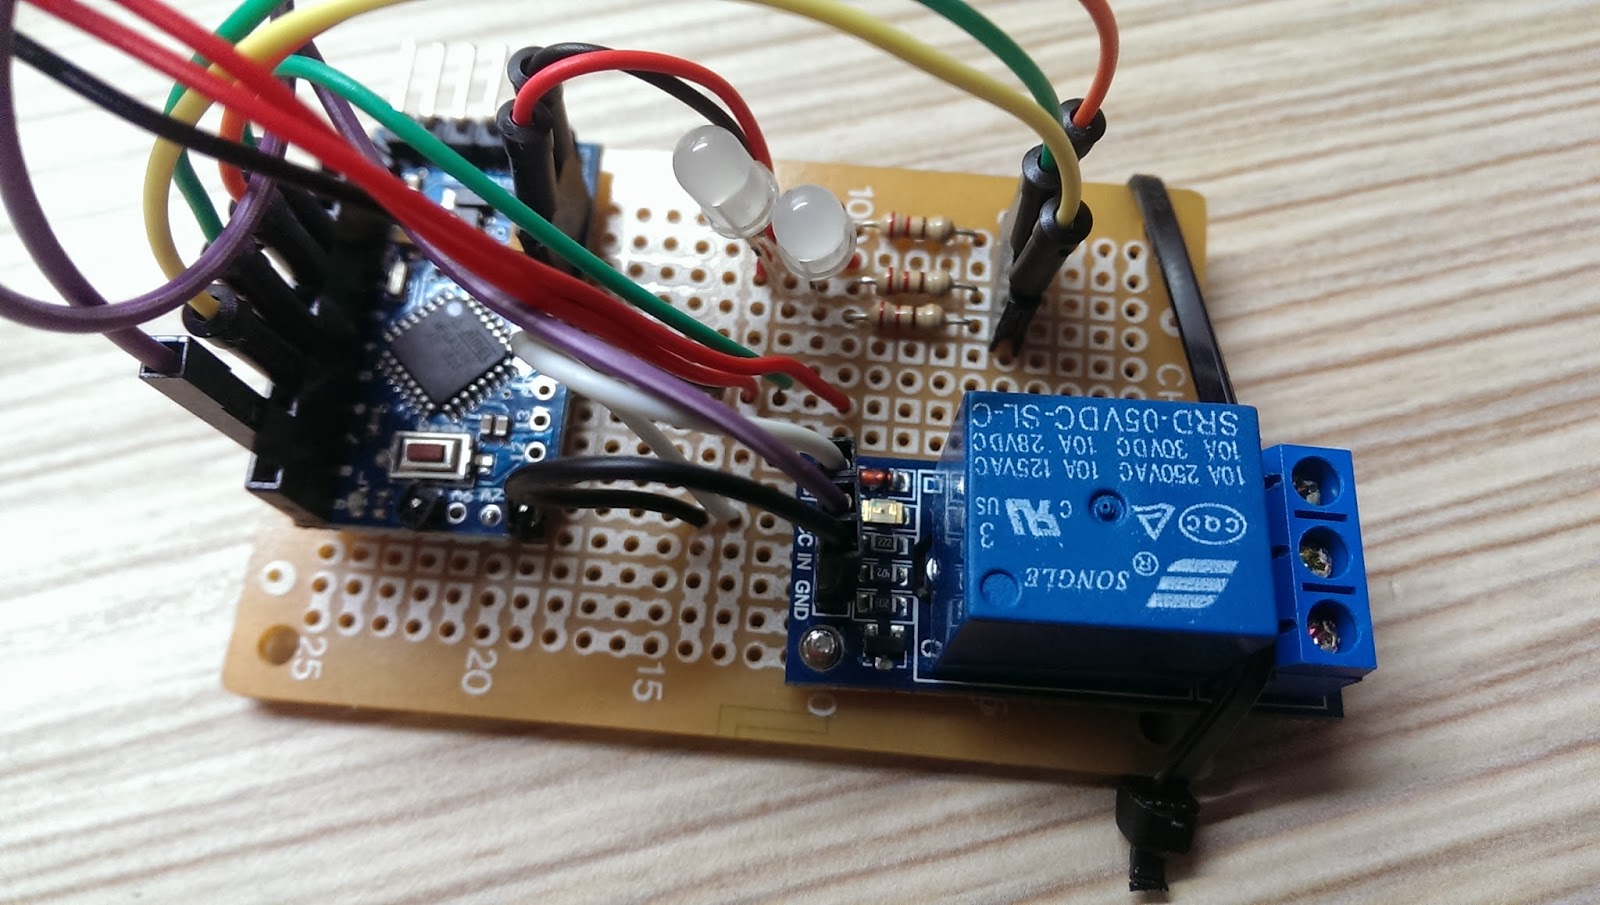
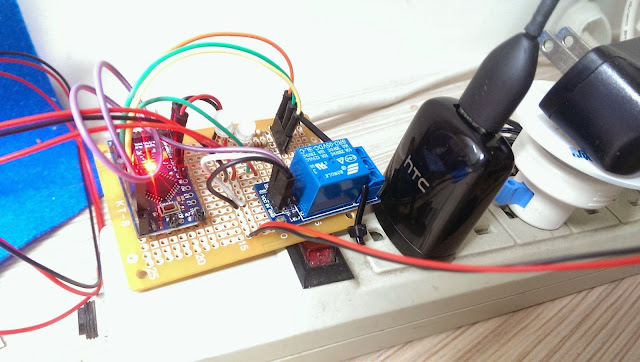
      I used a screw to fix the relay module on the perfboard. However, fixed on one side is not stable enough, so I took a cable tight to keep the relay module tightly in place.  *Remember to reserve a very long IR reception wire*, so the IR receiver could placed outside of the celling light or the IR receiver might be obscured by the decorative glass cover.


      Here is the over all system in action!


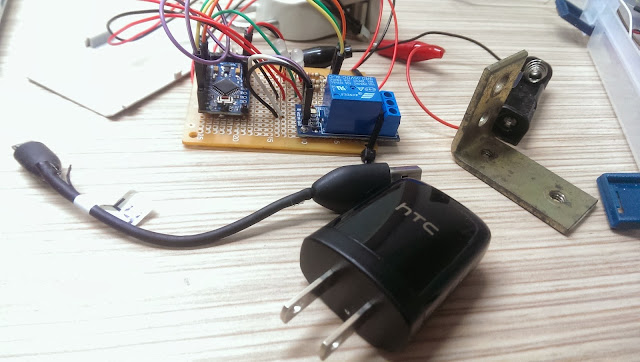
      Next, find a good power source for the system. 
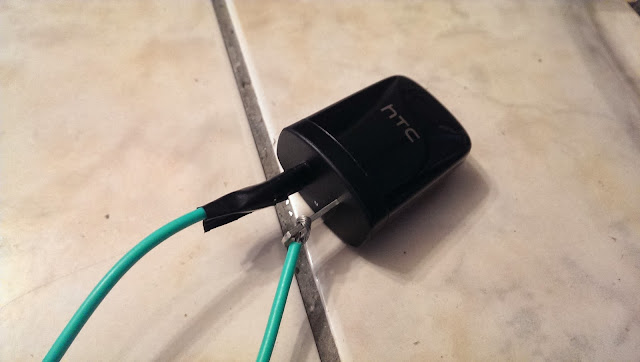
      For this project, I used a HTC smart phone charger. At least, HTC is (or was?) an international brand name smartphone company and has good reputation regarding to safety. Again, for safety reason, please use certified chargers only, such as CE, FCC, UL from well-know brand name company. *** Do not use no brand or very cheap chargers from unknown source. You are on your own risk! ***


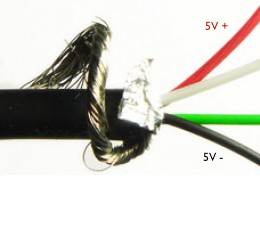
      I used a short USB cable to connect the HTC charger to the system.  Cut the USB cable near micro-B (smaller connector) and strip the shielding off the cable. In there, you will find four wires with GREEN, WHITE, RED, BLACK. Solder the RED(5V+) and BLACK(GND) wires to positive and negative respectively on the perfboard. 

      Cable connection:
      • USB type-A (Larger connector) to HTC charger
      • USB micro-B (smaller connector) to system


      After soldered the USB wires, plug the charger to power outlet and test the system.


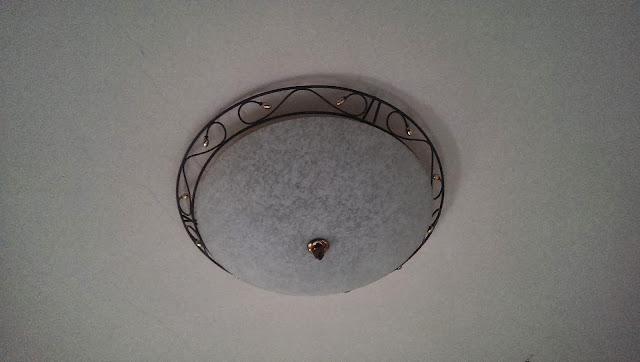
      My bedroom celling light looks like this below. It has a switch located at the entrance of the bedroom. And the switch works like this. After implement this system, the control of the switch will be shift to Arduino Mini Pro.

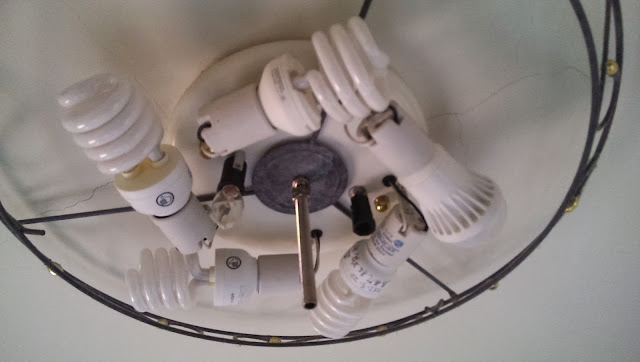
      For every switch on/off, it cycles through 

      1.  Turn on three lights
      2.  Turn off
      3.  Turn on Five lights
      4.  Turn off 
      5.  Turn on two lights
      6.  Turn off


      Carefully loosen the screw from the bottom glass cover and remove the decorative glass away.


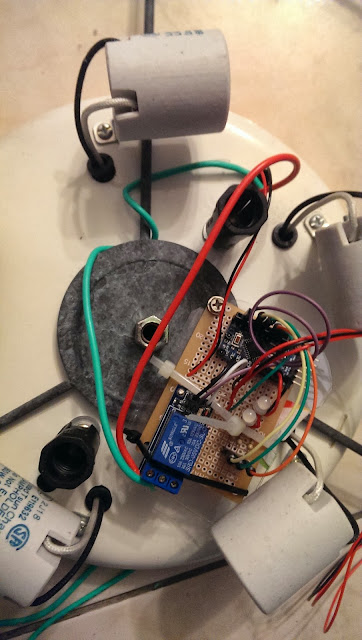
      Drill a hole on the light base for tightening the system.


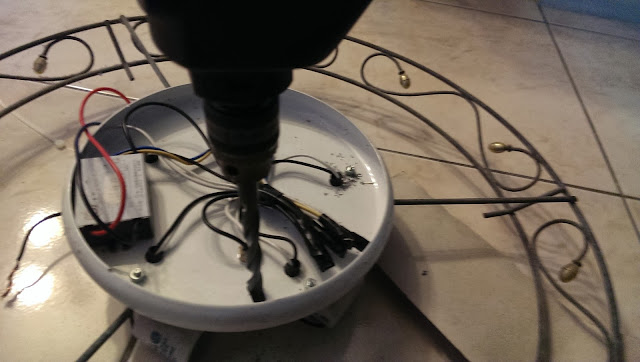
      Use a screw to secure the prefboard to the celling light as shown below.


      *** Important: Wrong connection will cause the light not working ***
      • Connect 110v VCC to "Relay NO (Normally Open)" on the left
      • Connect Relay COM (Common connection) to 110v GND


      When connect AC 110V power line to phone charger, please make sure the isolation is done properly. It would be better to use Heat shrink tube for the isolation. However, I didn't have those on hand, so I used the isolation tape and tight them 3~4 times to ensure it's 100% isolated.  

      *** Disclaimer: Many experts expressed safety concerns for connecting Arduino with relay to AC 110V power!  I'm not responsible for any damage or lose that could happened to your projects or properties! You are at your own risk of doing this! ***


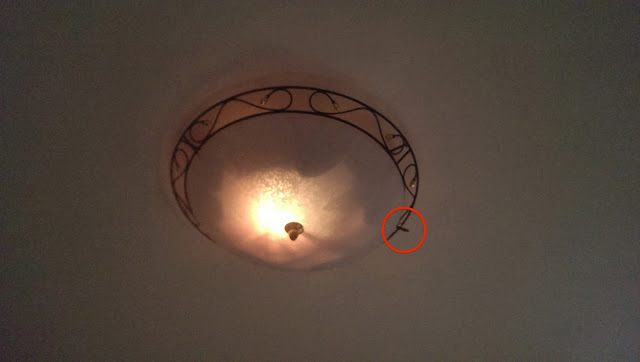
      Before tighten the light frame and decorative glass back to the celling, use the remote to test the system to see if it's working as expected.

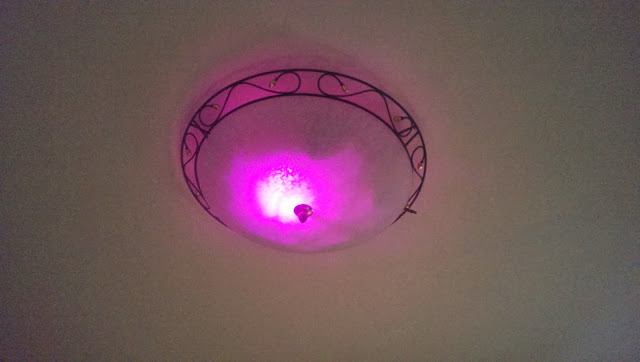
      See the red circle below, that's the IR receiver that I used an extended wire from the perfboard to the rim of the light to get better IR reception.


      Let's try to change the color with the TV remote.


      Finally, the project is completed! Watch the video below to see it in action!
      Now I can turn the celling light off directly from my bed after turn TV off!  


      This is the end of this tutorial. I hope you liked it! Please leave comments below and I will see you next time.

      Enjoy!


      2018/02/25

      Arduino - Switch celling light with TV remote (1/2)

       Preface

      It must be happened to you before that in a very cold night watching TV or movie in bed and you were ready for bed. You turned off the TV or DVD player with remote control easily. However, for the celling light, you just had to get out of the bed to turn the light off. What a pain! 

      After I searched the Internet, there are many examples out there suit for this purpose, such as IR receiver, relay module, and RGB LED shift hue and most of them have codes that I could utilize on this project.  

      Quick Link

      Material Needed

      • Arduino mini pro *1 
      • USB upload module *1 
      • Relay module (5V/10A/125V) * 1 
      • IR Receiver LED * 1 (Aixin AX-1838HS 38KHz * 1 / All 38KHz should work) 
      • RGB LED *2 
      • Resister 220 Om * 3
      • Few jump wires
      • Any TV or DVD remote you have at home
      • Breadboard * 1
      It's not difficult to find these components on Amazon or eBay.

      System Functionality

      Assign two buttons on the remote to control the celling light. Remember to assign less frequently used buttons on the remote or you might accidentally activate the particular function on your appliances. :)
      • Button 1: Turn on/off
      • Button 2: Switch LED color hues (static or color shifting)

      Schematic

      This schematic is made with Fritzing. 
      You can download it from its official website: www.fritzing.org


      Connections

      • IR Receiver to Arduino pin 2
      • IR Receiver + to VCC
      • IR Receiver - to GND
      • Relay + to VCC
      • Relay - to GND
      • Relay to Arduino pin 8
      • RGB Red to Resistor to Arduino pin 3
      • RGB Green to Resistor to Arduino pin 5
      • RGB Blue to Resistor to Arduino pin 6

      Check Remote IR code

      You have to find out the remote button IR codes on your remotes and embed them in the source code below for this project to work.


      For Example, my Sanyo TV remote has the following codes. As you can see, I have assigned two buttons for each feature to have a fall back plan.

      • Celling Light Switch function
        • Mute:irCode: 1CE318E7,  bits: 32  sanyoLight1
        • Channel minus :irCode: 1CE3D02F,  bits: 32  sanyoLight2
      • LED Switch function
        • Volume minus :irCode: 1CE3F00F,  bits: 32  sanyoLED1
        • CH View: irCode: 1CE352AD,  bits: 32 sanyoLED2

      To find out the IR codes for you remote, please refer to my previous IR Repeater Tutorial (Part 2)

      Source Code

      /*
       * Author: Stonez56
       * IRRemote for bedroom lighting control 
       *   Light buttons: Switch lights through the 
       *            cycle - 3, 5, 2, off with 2 types of remote
       *   LED buttons: Switch display random color a, b, transistion, off
       */
      
      #include <IRremote.h>
      
      // Setting up pins
      // Setup pin 8 for relay. 
      //    For some reason, Pin 13 will cause relay to switch one time
      //    when system powers on
      const int relay1Pin = 8; 
      const int redPin = 3;                    
      const int greenPin = 5;
      const int bluePin = 6;
      const int irReceiverPin = 2;
      
      // Milisecond to delay when shifting colors
      int colorShiftTime[] = {20, 10, 1, 50}; 
      int colorShiftTimeCounter = 0;
      
      int myPins[] = {2, 4, 8, 3, 6};
      int LEDstatus = 0;       // mode of LED or switch light
                          /*
                           * 0 = LED off
                           * 1 = LED orange
                           * 2 = LED color rotation
                           * 3 = Relay Light swtich
                           */
      
      int relay1Status = 0; // Switch of the relay; either 1 or 0;
      
      
      IRrecv irrecv(irReceiverPin);            
      decode_results results;  // IR decode_results 
      
      unsigned int rgbColour[3]; //RGB LED array
      
      unsigned int preCode = 0x0;  //Previous remote code
      unsigned int currentCode = 0x0; //Current remote code
      
      /* Define remote codes  
      Remote A (iBit Remote)
       Switch
        - (L/R) irCode: 609E09F6,  bits: 32 bitLigth1
        - Subtitle:irCode: 609E8877,  bits: 32  bitLight2
       LED Switch
        - Sound change irCode: 609E42BD,  bits: 32 bitLED1
        - Favorite channel:irCode: 609E728D,  bits: 32 bitLED2
        LED Color speed 
          - colorShiftTime: irCode: 
      
      */
       
      const unsigned long bitLight1 = 0x609E09F6;
      const unsigned long bitLight2 = 0x609E8877;
      const unsigned long bitLED1 = 0x609E42BD;
      const unsigned long bitLED2 = 0x609E728D; 
      const unsigned long bitLEDspeed = 0x609EAA55;
      /*
      Remote B (Sanyo Remote)
       Switch
        - Mute:irCode: 1CE318E7,  bits: 32  sanyoLight1
        - Channel minus :irCode: 1CE3D02F,  bits: 32  sanyoLight2
       LED Switch
        - Volume minus :irCode: 1CE3F00F,  bits: 32  sanyoLED1
        - CH View: irCode: 1CE352AD,  bits: 32 sanyoLED2
        LED Color speed
          - colorShiftTime: irCode: 
      
      */
      const unsigned long sanyoLight1 = 0x1CE318E7;
      const unsigned long sanyoLight2 = 0x1CE3F00F;
      const unsigned long sanyoLED1 = 0x1CE352AD;
      const unsigned long sanyoLED2 = 0x1CE3D02F;
      const unsigned long sanyoLEDspeed = 0x1CE350AF;
      
      void setup()
      {
        
        //////Serial.begin(9600);   
        irrecv.enableIRIn(); // enable IR pin
        pinMode(relay1Pin, OUTPUT);
        // Start off with the LED off.
        ledOff();
      }
      
      // Turn off LED
      void ledOff(){
        rgbColour[0] = 255;
        rgbColour[1] = 255;
        rgbColour[2] = 255;  
        setColourRgb(rgbColour[0], rgbColour[1], rgbColour[2]);
      
        preCode = currentCode;
        while(preCode == currentCode){
              currentCode = checkRemoteCode();
              // Check the code on Serial port
              Serial.print(rgbColour[0]); Serial.print(" | ");
              Serial.print(rgbColour[1]);  Serial.print(" | ");
              Serial.println(rgbColour[2]);
        }
      }
      
      /*
      * Turn on LED to Orange color
      */
      void ledOrange(){
        //LED color orange??
        rgbColour[0] = 65391;
        rgbColour[1] = 400;
        rgbColour[2] = 255;  
        setColourRgb(rgbColour[0], rgbColour[1], rgbColour[2]);
      
        preCode = currentCode;
        while(preCode == currentCode){
              currentCode = checkRemoteCode();
        }
      
      }
      
      
      /*
       * Rotating RGB LED color
       */
      void colorRotation(){
        // Start off with red.
        rgbColour[0] = 0;
        rgbColour[1] = 255;
        rgbColour[2] = 255;  
      
        preCode = currentCode;
       
        // Choose the colours to increment and decrement.
        for (int decColour = 0; decColour < 3; decColour += 1) {
          int incColour = decColour == 2 ? 0 : decColour + 1;
       
          // cross-fade the two colours.
          for(int i = 0; i < 255; i += 1) {
            rgbColour[decColour] -= 1;
            rgbColour[incColour] += 1;   
      
            setColourRgb(rgbColour[0], rgbColour[1], rgbColour[2]);
            delay(colorShiftTime[colorShiftTimeCounter]);
            currentCode = checkRemoteCode();
      
      /*
            Serial.print(" R:");Serial.print(rgbColour[0]);
            Serial.print(" G:");Serial.print(rgbColour[1]);
            Serial.print(" B: ");Serial.println(rgbColour[2]); 
            */     
            //if accepted new remote codes,
            //     exit this function and back to the main loop;
            if(preCode != currentCode){
              return;
            }
          }
        }
      } // End of LED color rotation
      
      
      /* This turn on/off relay switch
       *
       */
      void switchRelay(){
        relay1Status = 1 - relay1Status;   
         if(relay1Status == 0){
          digitalWrite(relay1Pin, HIGH);
          delay(500);
         }else{ 
          digitalWrite(relay1Pin, LOW);
          delay(500);
         }
      }
      
      /* Check remote code and return a mode to be changed
       *
       */
      int checkRemoteCode(){
        if (irrecv.decode(&results)) { // Received IR code and decoded ok!
          // Print to Serial port for debug purposes
          Serial.print("Color shift time: ");
          Serial.print(colorShiftTime[colorShiftTimeCounter]);
          Serial.print("  irCode: ");           
          Serial.print(results.value, HEX);    // IR decode
          Serial.print(",  bits: ");          
          Serial.println(results.bits);        // IR codes
          
          irrecv.resume();                    // Continue to receive next IR code 
          if(results.bits == 32){ //only 32bit code will be evaluated
            switch(results.value){
              /*All these buttons switch lights */ 
              case bitLight1:
              case bitLight2:
              case sanyoLight1:
              case sanyoLight2:  
              case 0x992A2843: //Benq Remote Green button for test
                   LEDstatus = 3; //switch relay;
      
                break;
              case bitLED1:
              case bitLED2:
              case sanyoLED1:
              case sanyoLED2:
                    //Check LEDstatus and switch to next mode
                    LEDstatus += 1;
                    if(LEDstatus >= 3){ 
                        LEDstatus = 0; //LEDstatus only has 0,1,2 if == 3, reset it to 0;
                    }
                break; 
              case bitLEDspeed:
              case sanyoLEDspeed:
                    colorShiftTimeCounter++;
                    if(colorShiftTimeCounter==4){ 
                        colorShiftTimeCounter=1; //only 4 elements, from 0~3
                      }
                    colorShiftTime[colorShiftTimeCounter];
                break;
              default:
                break;        
            } //switch
          } // check 32bits
        } //end of get a remote code
      
        return LEDstatus;
      }
      
      void setColourRgb(unsigned int red, unsigned int green, unsigned int blue) {
        analogWrite(redPin, red);
        analogWrite(greenPin, green);
        analogWrite(bluePin, blue);
       }
      
      void loop(){
        switch(LEDstatus){
           case 0:
              ledOff();
              break;
           case 1:
              ledOrange();
              break;
           case 2:
              colorRotation();
              break;
           case 3:
              switchRelay();
              LEDstatus = 99;
              break;
           default: // set it up to do nothing, but wait the remote code to activate
               break;
        }
        //constanly check new remote code
        LEDstatus = checkRemoteCode();
        //////Serial.print("LEDstatus: ");Serial.println(LEDstatus);
      } // end of loop
      
      
      Here is the prototype in the photo below.


      In next tutorial, I will show you the 2nd phase to put everything together and install the whole system in the celling light.  See you soon!


      2016/09/04

      Android App Control RGB LED w/ color Sliders


      If you haven't seen my previous Arduino + Bluetooth + RGB LED tutorials, please check them out from here, before you start this one.

      Tutorial 1 Make the Arduino + Bluetooth + RGB LED
      Tutorial 2 Make this App (older version)
      Tutorial 3 Make a nigh lamp
      In this tutorial, I will add RGB slider bar under the bottom of the App using App Inventor 2 (AI2) from MIT to allow users to adjust the particular LED brightness. This feature was requested by quite few of visitors. Hope you will enjoy this one!

      For whatever reasons you do not want to do this yourself, please download this App from Google Play Store directly. It's FREE!


      Screenshot of RGB LED Controller:


      Here is screenshot of the component layout in App Inventor 2 for your reference.


      First, let's initialize few variables in AI2.


      Screen1.Initialize block is to reset App components status and set ColorPicked at x1, y1. The ColorPicked variable is used to store x1, y1 coordinates which are exact positions where users finger tip location on the display.


      This part is considered as Bluetooth initialization to get nearby Bluetooth client list into the App.

      After users select Arduino Bluetooth clients (Arduino + HC-05 + RGB module), this App set "Status.Text" to BT Connected and let user know the App has connected to Arduino successfully.


      The block below turns the LED On/Off.

      The block below will disconnect Bluetooth connection and reset component status.

      This block sends Bluetooth command to Arduino after received color-code as well as save R, G, B color code value into a local Color_List2 (List is called Array in other programming languages)


      The following three big blocks process the R, G, B sliders respectively.
      Each time a slider's position changed, the App reflects the R/G/B value changed and save the value into Color_Code_to_BT variable and sends the new color code through SendBTCommend2 block to achange RGB LED color.


      This block works the same as the one above except it only handle Green color value.


      This block works the same as the one above except it only handle Blue color value.

      When user's finger is touch or slide across the display, this SendBTCommend block will send R, G, B value accordingly to Arduino.

      This SendBTCommend2 block is used to send RGB value to Arduino when R, G, or B value updated through R, G, B color sliders. The reason why I created this SendBTCommand2 to send R,G,B value was because there were different parameters needed to be processed before send BT command to Android phone.

      The block blow is used to update RGB color to Arduion when user's finger touch on any part of the screen or in this case we only focus on the color wheel.


      The block blow is used to update RGB color to Arduion when user's finger slide through the screen of the screen or in this case we only focus on the color wheel. This block is also where this App process rapid change of the LED colors!


      Here is a video demonstration of this App:


      You probably want to test this APP first before making it, correct? Please download the RGB LED Controller V3.0 with R/G/B Color slider from App Store. For people who already downloaded this App, you should be able to upgrade to this version directly from Google Play Store.  

      Thank you!

      END
      --------------------------------------------------------------------
      如果你尚未閱讀過我前幾篇介紹如何製作Android + Arudino + BT + RGB LED的文章,建議先參考前幾篇(下列的連結),再回來看這一篇。

      Tutorial 1 製作 Arduino + Bluetooth + RGB LED
      Tutorial 2 自制 APP (本篇為新版APP,加入了 R.G.B 顏色拉桿)
      Tutorial 3 製作夜燈

      如果你不想自己動手做這個 APP, 請你到 Google Play Store 免費直接下載!


      在本篇教學裡,我們將修改前一版的 V2.0 APP,使用 App Inventor 2  (AI2) 加入 R.G.B 三個顏色拉桿,讓使用者可以自行調整每個顏色的強度,進一步改變 LED 的顏色。會加入這個功能的主要原因是很多讀者都留言要求這個功能!讓我們開始動手吧!

      V3.0 APP 的畫面如下:


      這是 AI2 App 元件的畫面參考圖,你也可以依自己的需求作調整位置/大小等等⋯⋯


      首先先在AI2中設定幾個變數如下:

      下面的區塊是 AI2  的螢幕啟動設定,除了設定一些參數之外,也把 ColorPicked 設在 x1, y1 的位置。 ColorPicked 這個變數是用來儲存螢幕上,使用者正用手指點下的 x, y 位標。


      BTList.BeforePicking 是設定 Android 手機上所偵測到的藍芽裝置清單。


      BTList.AfterPicking 區塊主要作用為,一但使用者由手機選取了藍芽裝置(以這個APP例子來說,我們就是 HC-05 的 Android  上的藍芽裝置)。這個區塊也會把 Status.Text  設成 "BT Connected", 讓使用者知道,手機已成功連上 Arduino HC-05 藍芽模組。

      LedTurnOn 這個區塊主要功能是直接開/關 RGB LED。

      Disconnect.Click 這個區塊是用來中止藍芽的連線,同時也在 App 上顯示 "No BT Connected"。

      以下三個區塊 R.PositionChanged, R.PositionChanged 和 R.PositionChanged 主要是用來處理本次新增的 R, G, B 顏色拉桿。例如 R 拉桿位置改變時,這個區塊就會把 新的 R 顏色值和原來的 G, B 顏色值整合存入到 Color_Code_to_BT 變數,透過 SendBTCommend2 區塊送到 Arduino。

      這個區塊負責 R.PositionChanged 其運作方式和上面一樣。

      這個區塊負責 G.PositionChanged 其運作方式和上面一樣。

      這個區塊負責 B.PositionChanged 其運作方式和上面一樣。

      當使用者用手指點取調色盤上的某一個點或是用手指滑過調色盤時,這個 SendBTCommend 區塊是用來傳送 R, G, B 顏色參數到 Arduino。


      由於透過拉桿改變顏色的方法和直接在螢幕點選時參數不同,所以我建立了這個 SendBTCommand2 的區塊來專門㲃理。這個 SendBTCommend2 區塊是用來傳送 RGB 的參數到手機。

      Canvas1.TouchDown 區塊主要是處理手指點在調色盤的每一個位置的顏色,快速即時的把當時的顏色回報到 Arduino。

      Canvas1.Dragged 區塊主要是處理手指滑過調色盤的每一個點,快速即時的把當時的顏色回報到 Arduino。


      請看我手機錄下的 RGB LED Controller APP V3.0 執行過程:


      看完後是不是很想動手試試這個 APP?請由 Google Play Store下載 RGB LED Controller V3.0 with R/G/B Color slider  APP。如果你已經下載之前的版本,你應該可以以直接在手機上做更新。

      全篇完!
      --------------------------------------------------------------------