Showing posts with label Tello. Show all posts

2022/07/09

一起來學樹莓派系列 - “如何使用 Log2RAM” 來增加SD卡的壽命, 及Pi運作的速度.

 大家好, 歡迎收看本週的weekend project with Stonez56. 

今天來和大家分享 “一起來學樹莓派” 系列 - “如何使用 Log2RAM” 來增加SD卡的壽命, 及Pi運作的速度. 


Log 主要是由系統上執行的一些程式在背景寫入到你的磁碟裡.  它可能是幾分鐘寫入一次, 或是幾秒鐘就寫入一次, 頻繁的讀寫 很容易造成SD卡的損毀並且影響運作的速度.


如果我們將 Log 直接寫入RAM, 就可以減少讀寫的次數, 提升Pi的運作速度, 及延長SD卡的壽命. 這些寫入到RAM的 Log 並不會消失, 它會每天再把這些 Log 寫回到SD卡. 所以你還是可以存取這些 Log的.  


使用 Log2RAM 也不是沒缺點, 如果你的 Pi 突然斷掉電源, 那麼你的 Log 就會完全消失了.

但仔細想想, 你上次查看 Log 是什麼時候呢? 如果不常使用 Log, 那麼這個 Log2RAM 就對你非常有幫助. 另外如果你的 Pi 的記憶體只有1GB或是512MB, 那可能就不合適來使用這個軟體的. 


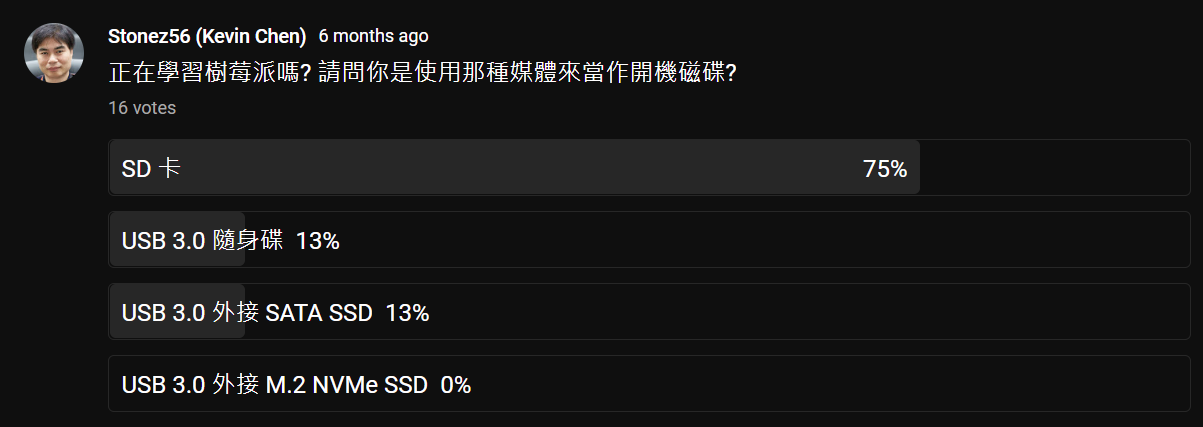
半年前我曾經做過一個簡單的線上調查, 看看各位使用樹莓派時, 用什麼儲存裝置.
調查的結果有75%的朋友都是使用SD卡. 那我們就開始今天的練習吧!
Step: 

  1. 更新你的 Pi

    • >sudo apt update

    • >sudo apt full-upgrade

  2. 安裝 rsync (用來同步兩地的資料)

    • >sudo apt install rsync

  3. 取得 Log2RAM

    • >wget https://github.com/azlux/log2ram/archive/master.tar.gz -O log2ram.tar.gz

  4. 使用 tar 來解壓縮

    • >tar xf log2ram.tar.gz

    • >cd /home/pi/log2ram-master

    • >sudo ./install.sh

  5. 先檢查system log 的大小

    • >sudo du -sh /var/log 41M

    • 先用3倍大小 = 120M

  6. 重新開機

    • >sudo reboot

  7. 檢查 log2ram 是否正常運作

    • systemctl status log2ram

  8. 如果想要檢查 log 怎麼辦呢? 把 log 寫回到 /var/log

    • >log2ram write

  9. 如果想要暫時停止或重新開始 log2RAM 怎麼辦呢?

    • >log2ram stop

    • >log2ram start


以後任何程式有寫入Log 到  /var/log, 就會被寫入到RAM裡面 


如何設定 Log2RAM

  1. 使用 Nano 來編輯設定檔 log2ram.conf

    • >sudo nano /etc/log2ram.conf

    • 找到 SIZE=40M, 看你係統的設定如果你的系統有產生很多少個話可以把設成120MB

    • PATH_DISK=”/var/log” 如果你還有其他的程式會時時寫入到SD, 可以在PATH_DISK後面加入分號, 再加入其它的路徑, 如: PATH_DISK=”/var/log; /var/mylog”

    • 儲存後並退出

    • 重新啟動樹莓派


想了解有哪些Log會寫入SD卡, 請到 /var/hdd.log/ 去看看有那些檔案被寫入.


2022/07/03

App Inventor #5 無線搖控 ESP32-CAM APP (Part 2)

 大家好, 歡迎收看本週的Weekend project with Stonez56。 本周要進行的是 App Inventor 第5集 - “無線搖控 ESP32-CAM APP Part 2”! 這個是一個專門為初學者來開發的一個系列, 所以會講的比較詳細, 相信各位只要仔細收看內容並進行實作, 一定會收獲滿滿滿。


因內容較多, 本影片分為上, 下兩集. 本集為 App Inventor程式設計. 

而上集為 UI 界面設計(https://youtu.be/x545mFSZWgg ),
如果你還沒有觀看的朋友, 請記得先去看一下, 再回來看這一集


再前一集是ESP32 程式的說明在這:
Arduino #35 使用 MQTT 無線搖控 ESP32-CAM 模組https://youtu.be/ECHBRdtV-yw 


好, 那我們就開始吧今天的練習吧~


2022/07/02

App Inventor #4 無線搖控 ESP32-CAM APP (Part 1)

 大家好, 歡迎收看本週的Weekend project with Stonez56。 本周要進行的是 App Inventor 第4集 - “無線搖控 ESP32-CAM APP Part 1”! 這個是一個專門為初學者來開發的一個系列, 所以會講的比較詳細, 相信各位只要仔細收看內容並進行實作, 一定會收獲滿滿滿。


因內容較多, 本影片分為上, 下兩集. 上集為 UI 界面設計, 下集為 App Inventor程式設計. 


上次為大家示範了如何使用HTML + CSS + Javascript來寫網頁程式(Arduino #35  https://youtu.be/ECHBRdtV-yw), 利用網頁版的MQTT來遠端搖控ESP32 , 收到了不錯的回響.

今天我們使用 App Inventor 2來開發遠端搖控的 APP來取代網頁版本. 在ESP32程式的撰寫不需做任何的改變, 因為只要 MQTT Topic 一樣, APP inventor 就可以發佈訊息到ESP32了! 超方便的!


App Inventor 使用 WebView 想串流影像時, 會出現: header fields are too long for the server to interpret. 這問題會在下集時, 跟各位說明. 


另外, 針對 ESP32 C++上的程式說明, 請看 Arduino #35  https://youtu.be/ECHBRdtV-yw


好, 那我們就開始吧今天的練習吧~


2022/06/18

Android #35 使用 MQTT 無線搖控 ESP32-CAM 模組

 大家好, 歡迎收看本週的Weekend project with Stonez56。

本周要進行的是 Arduino 第35集,"使用 MQTT 無線搖控 ESP32-CAM 模組”。這個是一個專門為初學者來開發的一個系列, 所以會講的比較詳細, 相信各位只要仔細收看內容並進行實作, 一定會收獲滿滿滿。好, 那我們就開始吧今天的練習吧~


!!! ESP32-CAM streaming 的程式是由這裡取得:
https://github.com/wjsanek/wjsanek/blob/main/Working_ESP32_CameraWebServer_V2_with_OTA.zip

 這位高手把一大堆沒有用到的ESP32-CAM的程式移除, 所以我才有機會把程式寫成可以OTA.


在 VScode 裡, ESP32-CAM 的模組, 設定如下:

Board: ESP32 Wrover Module

  • Upload Speed: 115200

  • Flash Frequency: 80MHz

  • Flash Mode: QIO

  • Partition Scheme: Minimal SPIFFS (1.9MB APP with OTA/190KB SPIFFS)


本次學習的目標是能遠端遙控 ESP32-CAM, 所以會用到下列的程式

  • ESP32-CAM - Camera 伺服器 串流影像

  • Servo - 控制 SG90 伺服器擺動

  • ESPAsyncWifimanager - 隨時改變 Wi-Fi 設定

  • AsyncElegantOTA - FOTA - 隨時隨地的更新 firmware

  • MQTT - PubSubClient - 由ESP32-CAM 收送訊息

  • Paho MQTT Javascript client - 由瀏覽器 收送訊息 / HTML 編寫


本專案會用到下列的電子元件:


  • ESP32-CAM * 1

  • 天線 * 1

  • SG90 Servo 伺服器 * 2 - 上下 & 左右擺動各一個

  • 1000uf 電容一顆 * 1 - 過濾影像的水波紋

  • 杜邦線 * 4 - Power, GND, IO12, IO13


參考資料:


2018/12/02

Scratch Programming for Tello

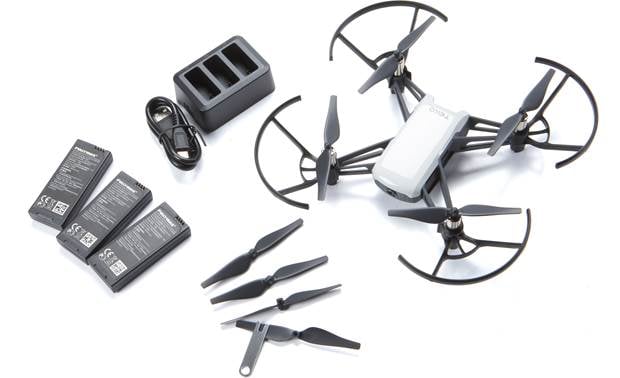
Just bought a Tello Drone from an online shop during Black Friday Sales in Taiwan. I was luck to get the Tello Boost Combo with 3 battery and a 3-in-1 charging hub for USD$110.2
「Tello 3-in-1 charging hub」的圖片搜尋結果
The photo above was from DJI website.

!!! Caution !!!

  • If this is your first try to program Tello with Scratch, please do this in door first!
  • There were few times where I placed wrong blocks and Tello just kept went up and stayed close to celling and I was unable to control it at all. This was caused by wrong command blocks I used. If I was outdoor that time, I didn't know where Tello would fly to.

Download & Install 

  1. Install Scratch 2.0 Offline Editor on your Mac or PC. Download it from here: https://scratch.mit.edu/download This is the Scratch program editor. You will write your code in this editor to control Tello. If you don't know how to use Scratch, here is a good place to learn: https://scratch.mit.edu/projects/editor/?tip_bar=getStarted
  2. Install Node.js from here: https://nodejs.org/en/ This program is simulate the Tello smartphone App that it allows you to communicate your PC/Mac to Tello. You do not need to know how Node.js works. Just run the Tello.js script and Tello will be controlled by Scratch.
    • Remember where Node.js is installed
    • $> Node.js v10.14.0 to /usr/local/bin/node
    • $> npm v6.4.1 to /usr/local/bin/npm
  3. Download Tello.js and Tello.s2e from https://dl-cdn.ryzerobotics.com/downloads/tello/20180910/scratch0907.7z
    • The scratch0907.7z requires 7zip to unzip it
    • Remember where Node.js is un-zipped
    • Tello.js is used by Node.js to communicate with Tello
    • Tello.s2e is Scratch extension block code that generate specific Tello Blocks
  4. A better version of Tello.s2e has been created by Yiupa. Down it from Git-Hub. https://github.com/yiupa/tello-scratch-extension/tree/English-version Download from Git-hub to replace Tello.s2e with the new Scratch Extension TelloKanji.s2e

Step by Step

  • Start Scratch 2.0. Hold "Shift" key and click "File" menu, then click "Import Experimental HTTP Extension" and select "Tello.s2e" file where you just downloaded. 

  • The Tello interface will be shown in Scratch under "More Blocks". All the Tello command blocks are placed below.

  • First, click "Events" and drag "When green flag clicked" block to the scripting area.

  • Then click "More Blocks" and drag all the blocks to scripting area according the graphic shown below. First, "Takeoff", then "fly up 50cm", "fly forward 50cm", "fly backward 50cm", "flip f", and last "land".  
  • These commands are quite self explanatory. You may change the numbers in the white oval area to change the fly distance.
  • The "flip f" block is tell Tello to perform a flip operation. "f" means forward and you can change to "b" for backward, "l" for left flip, and "r" for right flip.
  • Click "File"->"Save" this script for future use.

  • Next, connect your PC/Mac Wi-Fi to Tello. Usually, the Wi-Fi SSID is "Tello-XXXXXX"
  • Next start Node.js 
    • For PC, open windows command line window and execute node.js (Sorry, I didn't try this on PC)
    • For Mac, open a terminal and go to the directory where you unzipped Tello.js
    • $>cd 
    • $>cd ~/Download/scratch
    • $>~/Download/scratch$ node Tello.js
    • If you see "Data received from server: ok. Received 2 bytes from 192.168.10.1:8889" Means the connection is ok!
  • Click the green flag and your Tello should be able to fly according to the command blocks you placed in the scripting area. Here I try to let Tello to fly in a square and then land.

  • From the terminal, you can see what actions have been performed and Tello responded with "OK". It means the communication is good!

  • You may also show Tello current status in the Scratch stage by click the option box in "More Blocks". See the screenshot below, such as showing height, battery %, and speed...etc.


  • Here is video of Tello followed commands from Scratch to share with you.


    That's it. I hope you enjoyed this tutorial and have a safe flight. 

    END.

====== 中 文 版 (Chinese Version)=========


最近在台灣黑色星期五銷售期間,從網上商店買了一台Tello 無人機! 我很幸運能夠買到 Tello 暢飛套組,包括了 3 個電池和3合1充電器,售價 NT$3400 元! 很超值!
「Tello 3-in-1 charging hub」的圖片搜尋結果
上面的照片來自DJI網站

!!! 請 注 意 !!!

  • 如果這是您第一次嘗試使用Scratch 來控制 Tello,請先在室內中測試程式!
  • 有好幾次,我放置了錯誤的積木指令,Tello 繼續上升並且靠近天花板,我根本無法控制它。 這是由我使用的錯誤指令區塊造成的。 如果那時我在室外,我根本不知道 Tello 會飛往哪裡。

下載必要程式及安裝 

  1. 在Mac或PC上安裝Scratch 2.0 Offline Editor。 從這裡下載:https://scratch.mit.edu/download 這是Scratch程式編輯器。 您將在此編輯器中寫程式來控制Tello。 如果你沒有使用過 Scratch,可以先到這裡熟悉一下 Scratch: https://scratch.mit.edu/projects/editor/?tip_bar=getStarted
  2. 接著從這裡安裝 Node.js: https://nodejs.org/en/
    這是用來模擬 Tello 手機 APP,它可以您將您的PC / Mac與 Tello 連線。 您不需要知道 Node.js 的工作原理,只需運行 Tello.js 程式,Scratch 就可以控制 Tello。
    • 記下  Node.js 安裝的目錄
    • Node.js v10.14.0 安裝在  /usr/local/bin/node
    • npm v6.4.1 to 安裝在 /usr/local/bin/npm
  3. 從下列網址下載 Tello.js 以及 Tello.s2e https://dl-cdn.ryzerobotics.com/downloads/tello/20180910/scratch0907.7z
    • scratch0907.7z 這個檔案需要 7zip 才能解壓縮
    • 請記下 Node.js 及 Tello.js 解壓縮後的檔案位置
    • Node.js 使用 Tello.js 與 Tello 進行連線
    • Tello.s2e 是Scratch 擴展代碼,用來產生特定 Tello 程式區塊
  4. Yiupa 修正了一個更好的 Tello.s2e 版本,你可以從 Git-Hub下載。 https://github.com/yiupa/tello-scratch-extension/tree/English-version

如何使用

  • 啟動 Scratch 2.0程式後,按住 “Shift” 鍵並點選 “File”,然後點 “Import experimental HTTP extension” 接著選擇剛剛下載的 “Tello.s2e”,即可以載入。

  • Scratch 界面將在"More Blocks"下,你可以看到所有的 Tello 命令區塊都放在下面。

  • 首先,點選 "Events" 並將 "When green flag clicked" 塊拖到右方的程式區域。

  • 然後點說"More Blocks"並如下圖所示,將所有你要使用的程式區塊拖動到右方程式區域。這裡我做的範例: 首先,“take off 起飛”,然後“fly up 50 cm”,“fly forward 50cm”,“fly backward 50cm”,“flip f”,最後“land 降落”。 
  • 這些命令非常的簡單易懂,而且您可以更改白色橢圓區域中的數字以變更飛行距離。
  • “Flip f”塊告訴 Tello 執行翻轉。 “f”表示向前,你可以改為“b”表示向後,“l”表示左翻,“r”表示右翻。
  • 最後別忘了點 “File” “Save”將此檔案保存。

  • 接下來,將您的PC / Mac Wi-Fi 連接到 Tello。通常,Tello Wi-Fi SSID 是 “Tello-XXXXXX”
  • 再來是執行 Node.js 
    • 使用PC的朋友,請打開 Command 視窗並執行node.js(對不起,我還沒試過PC,請你試試看)
    • 對於使用 Mac 朋友,請打開終端機並先到你到解壓縮Tello.js的目錄下
    • cd 
    • cd ~/Download/scratch
    • ~/Download/scratch$node Tello.js (執行 紅色指令)
    • 看到 Data received from server: Ok
      Received 2 bytes from 192.168.10:8889 表示連線已完成。
  • 接著,點下綠色𣄃誌,Tello 就應該能夠根據您放在程式區域中的指令區塊進行飛行。 在這裡,我試著讓特洛繞飛一個長方形的路徑,然後降落。

  • 從 Mac 終端機中,您可以看到被執行的區塊指令,Tello 回覆 “OK”。 表示連線沒有問題,指令收到!

  • 如果你點下 "More Blocks" 裡面有很多 Tello 的資訊可以顯示在 Scratch 的畫面裡(Scratch 左側有一雙猫的畫面) 請參閱下面截圖,例如顯示高度,電池百分比和速度等。
    這是我錄下 Tello 依照Scratch的指令飛行的影片,供您參考。

    希望你喜歡這個教學並小心飛行。