Problem to solve for 3D printer:
Filament was broken inside the Bowden tube during a print.
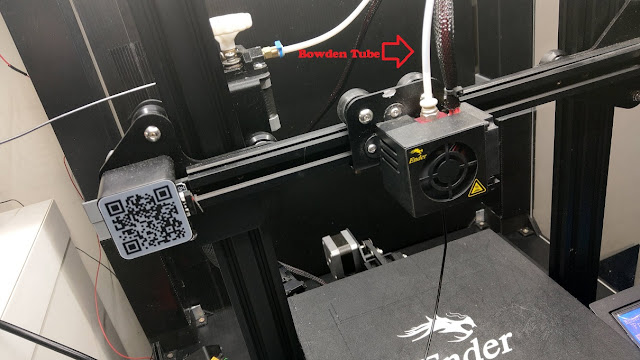
My printer is Creality Ender 3s (or Ender 3 Pro). Maybe the tension on the filament spool was so tight caused filament broken inside the tube.

My printer is Creality Ender 3s (or Ender 3 Pro). Maybe the tension on the filament spool was so tight caused filament broken inside the tube.
How to remove the broken filament:
- Turn on Ender 3s
- Adjust nozzle temperature to 210 degree Celsius (keep it at 210 degree the whole time)
From main menu -> Control -> Temperature -> Set it to 210

- Raise the Z axis to see the nozzle from below
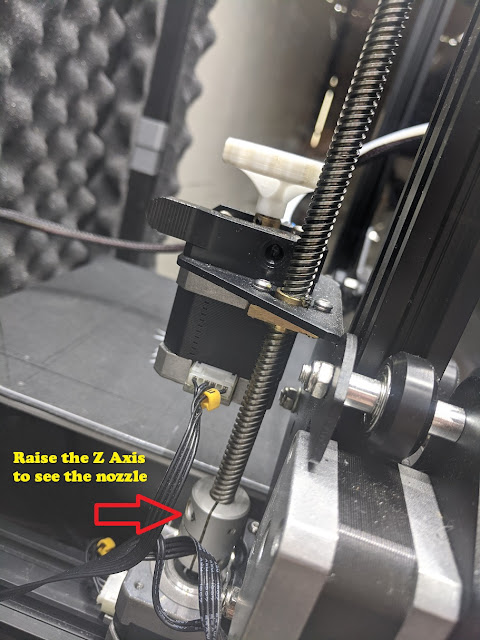

- Remove the nozzle with a wrench. Remember the nozzle is heated at 210 degree; it's super hot! It's better to use a socket wrench to remove the nozzle.


- Cut the end of filament flat and then push it through Bowden tube, until the broken filament is pushed out of the Bowden tube.


- Use the socket wrench to screw the nozzle back to the printer.
- Be sure the nozzle is really tight and level the bed before try to return nozzle back to home. Here is what happened to my magnetic bed! (see below) I forgot to level the bed and hit the HOME command, then the nozzle scratched it badly! (The photo shown was after I cut the scratched part off the bed.)

- Readjust the bed with paper method
- Done.
References:
==== 中文版 ====
- Turn on Ender 3s
- Adjust nozzle temperature to 210 degree Celsius (keep it at 210 degree the whole time)
From main menu -> Control -> Temperature -> Set it to 210 - Raise the Z axis to see the nozzle from below
- Remove the nozzle with a wrench. Remember the nozzle is heated at 210 degree; it's super hot! It's better to use a socket wrench to remove the nozzle.
- Cut the end of filament flat and then push it through Bowden tube, until the broken filament is pushed out of the Bowden tube.
- Use the socket wrench to screw the nozzle back to the printer.
- Be sure the nozzle is really tight and level the bed before try to return nozzle back to home. Here is what happened to my magnetic bed! (see below) I forgot to level the bed and hit the HOME command, then the nozzle scratched it badly! (The photo shown was after I cut the scratched part off the bed.)
- Readjust the bed with paper method
- Done.


References:
==== 中文版 ====
3D印表機要解決的問題:
在3D列印過程中,線材在送料管中間斷掉了。
我的3D印表機是 Creality Ender 3s(或Ender 3 Pro)。 可能是我把線材軸上放在地上, 造成它的張力過,導致線材在送料管內斷裂。
我的3D印表機是 Creality Ender 3s(或Ender 3 Pro)。 可能是我把線材軸上放在地上, 造成它的張力過,導致線材在送料管內斷裂。
如何取出折斷的線材:

- 打開 Ender 3s 電源
- 將噴嘴溫度調到210度(一直保持在210度)
從主選單—>控制—>溫度—>設定為210
- 用手旋轉Z軸,從下方看噴嘴
- 用扳手慢慢的轉下噴嘴。 注意: 噴嘴已加熱到210度,超級熱! 最好使用套筒扳手轉下噴嘴。
- 將新的線材剪平,然後將它推入送料管中,用新的線材推出斷的線材,一直到把斷掉的線材從送料管裡面推出來。
- 使用套筒扳手將噴嘴擰回到印表機上。
- 請確保將噴嘴確實擰緊並請整印表磁床的水平。
我在還沒有調整水平時, 就去按下HOME 的指令! 然後噴嘴就嚴重刮傷了我的磁床!
(照片是我從磁床上割下來劃傷的部分,右邊沒受傷的部份繼續用,哈!)
- 採用紙張的方式重新調整磁床水平
- 大功告成

從主選單—>控制—>溫度—>設定為210

我在還沒有調整水平時, 就去按下HOME 的指令! 然後噴嘴就嚴重刮傷了我的磁床!
(照片是我從磁床上割下來劃傷的部分,右邊沒受傷的部份繼續用,哈!)


